Ingredients
Equipment
Method
Mix Dough
- In a bowl, combine your water and active sourdough starter. Mix thoroughly until it appears "frothy".250 grams water, 100 grams active sourdough starter

- On your scale, measure out 150 grams of Roas Arrabbiata sauce or your chosen marinara sauce.
- In a small blender or using an immersion blender, blend the sauce until it runs smoothly.
- Add the Rao's Arrabbiata sauce to the bowl, then mix thoroughly with the active sourdough starter and water.150 grams raos arrabbiata sauce
- Add the salt and bread flour to the wet ingredients, and mix until no dry patches of flour remain.12 grams salt, 500 grams bread flour

- Cover the dough and let it rest on the counter for 30 minutes.
You will need to mix this thoroughly with your hands, most likely, once your whisk can no longer mix the dough.
Stretch-and-Folds
- While your dough is resting, on your scale, measure out your shredded cheese, pepperoni, and dried herbs.
- After 30 minutes, uncover your dough and do your first round of stretch-and-folds. Cover and let rest for another 30 minutes.
- After 30 minutes, uncover your dough and, using half of the cheese, herbs, and pepperoni, place them on top and press them in so they stick to the top. Perform your stretch-and-folds as usual and let the dough rest for another 30 minutes.

- After 30 minutes, uncover your dough, empty the remaining inclusions onto the top, and perform the last set of stretch-and-folds. You may need to take the dough out of the bowl and really stretch it; that's fine. Once the last round is done, cover your dough and let it rest in a warm area on your counter for bulk fermentation.

Bulk Fermentation
- This step can take anywhere from 6 to 12 hours, depending on the temperature of your dough, the ingredients, and the environment it's resting in. Let it double in size.
Shaping and Cold Proof
- Once the dough has finished bulk fermentation and doubled in size, it's ready to shape.
- On a clean surface, empty your dough out and begin coaxing it into a ball with your hands, using push-and-pull motions from top to bottom. You can also use a dough scraper here, but it's not necessary.
- You'll want to perform at least 10 to 12 push-and-pull motions. Ensure your dough has formed tension on the top before moving to the next step.
- Dust your banneton or bowl lightly with flour or rice flour.1 tbs rice flour
- Flip your dough upside down into the banneton or bowl. Stitch up the bottom of your dough if necessary. Cover your dough tightly and place it in the refrigerator for 6 to 12 hours.
Check out my sourdough loaf shaping video if you'd like to see an example of this.
Shaping and Baking
- Place your Dutch oven or heavy-bottom pot into a cold oven and preheat it to 450℉.
- While your oven preheats, remove your dough from the refrigerator and turn it out onto a sheet of parchment paper or a bread sling, if you have one.

- Using a bread lame, razor, or serrated knife, score your dough from front to back, about ¼ inch deep, at a slight angle.

- Spray your loaf, while still on the parchment paper, with water to create more steam during baking. If you'd like to skip this step, you can.
- Remove your Dutch oven from the oven and place your loaf inside it. Place the lid back on and return it to the oven to bake for 35 minutes.
- After 35 minutes, remove the lid and check the internal temperature of the loaf.
- It will most likely need a few more minutes to brown on top; place it back in the oven for 5 to 10 minutes, or until it's completely baked and toasted to your liking.
Once your oven reaches 450℉, set a timer for 30 minutes to ensure it reaches that temperature before putting your loaf in to bake.
Don't stress about this, just do your best. Your scoring will get better as you go!
You can also put a few ice cubes into your Dutch oven or heavy-bottom pot if you prefer.
The internal temperature should reach 208℉ to 210℉ when it's fully baked.
Resting
- Once your dough has finished baking, remove it from the Dutch oven and place it on a wire rack or cooling rack for at least 2 hours to cool.
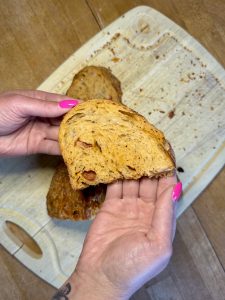
- Once cooled, slice and enjoy!

It's very important to allow your loaf to cool for at least 2 hours before slicing to ensure it's done and no longer gummy. It's worth the wait!
Notes